
Bill Poulson07.13.18
Are you having to send the ink tech to press on every job? Are there variations from press to press? These are the types of issues we have to deal with every day as a flexo printer. Why do we have to reformulate inks on certain presses in our day-to-day color matching? This is what I want to touch base on with this article. In many cases this is a daily struggle that many flexo converters struggle with. Here we will review how to identify the problem by knowing and exposing where it is happening and eliminating it in an effort to create a consistent press environment.
Many converters have a variety of press types. These presses may print with enclosed chambers, reverse angle blade systems, rubber roller assist or even at times two roller doctoring. All these doctoring types, along with different press designs and anilox O.D. sizes that affect the RPM (revolutions per minute) of the anilox roller, can allow for a different ink film transfer. I would like to illustrate my approach to press standardization and correlation across all presses. This is a process I have implemented at many converter sites, and it has been a beneficial approach. It takes time and patience to get it done properly. We need a baseline to match it to, as well, and that baseline is the ink technician’s proofer.
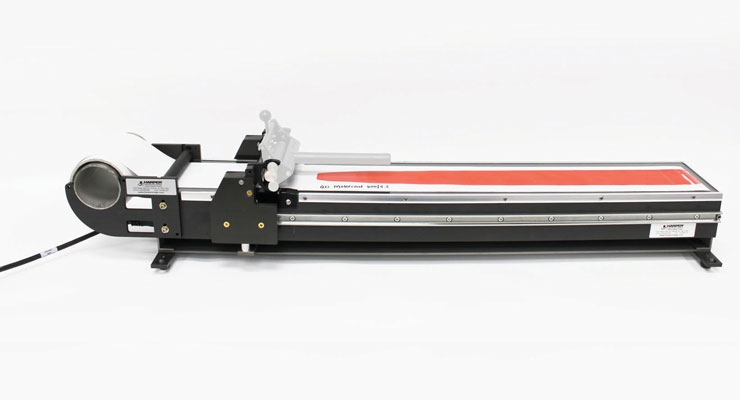
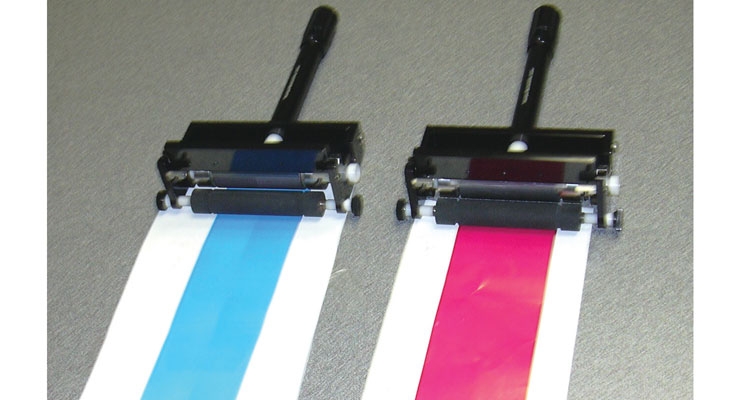
When proofing in the lab, you expect to match and get the same color transfer when you go to press. That is if the press is laying down the same ink film thickness or volume used by the ink technician. It makes the technicians job more complicated when the target is moving. The ink lab needs to get the same results time after time when their ink goes to any press. They usually do but the presses are using a variety of volumes. Use a proofer device that will correlate with the flexo process consistently and you will stop the target from moving.
Anilox maintenance is the cornerstone of the flexographic process. Having a system in place where every anilox at every press is documented and accounted for day-to-day for all to see is needed. Have a cleaning program in place where someone not only manages and maintains each anilox roller’s performance will allow a pressroom to run efficiently. If you have 100 to 500 aniloxes, you need this to happen daily. Set up your anilox prep area with the proper offline equipment that will thoroughly clean your inventory on an ongoing basis. Having a trained individual to inspect the anilox rollers and have him or her identify what is needed in an ongoing practice day-to-day will pay itself off immediately. If you do not have the luxury of having the personnel needed, then spread out the responsibility between all the press personnel. Make them own how their rollers are cared for and share this responsibility on all shifts. They should set up internal schedules for managing and cleaning the rollers. Once this is in place, there needs to be a standardized inventory for every press based on the type of work they produce. This can be achieved by implementing an Anilox Management Program, where aniloxes can be evaluated and cleaned. Having that capability will allow you to maintain the rollers. This is the foundation of a standardized pressroom. This will make sure that the anilox rollers are press-ready when they go on press. Let’s discuss the steps needed to ensure you will have a fully standardized anilox inventory.
Anilox Standardization
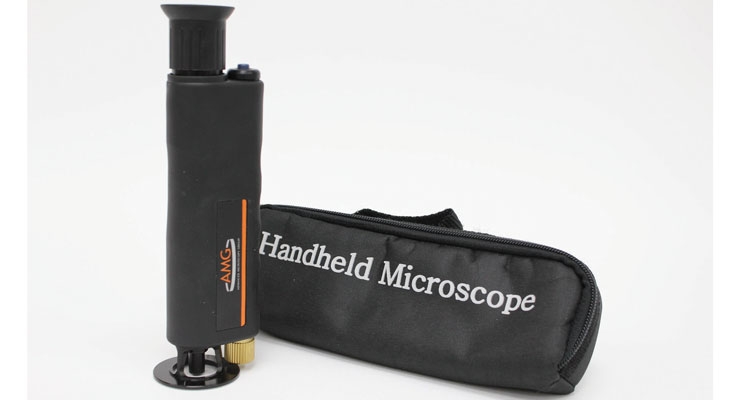
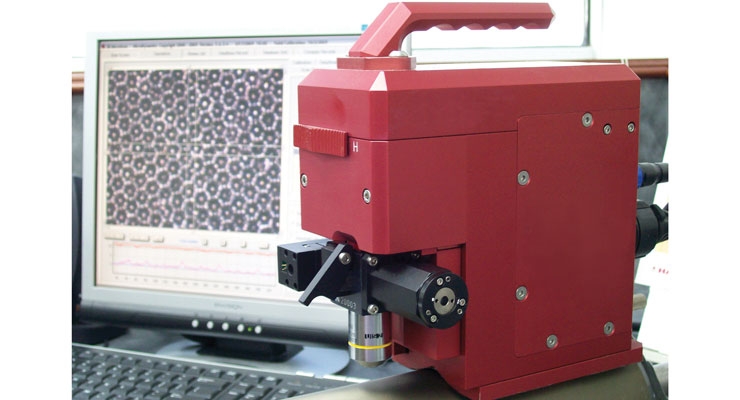
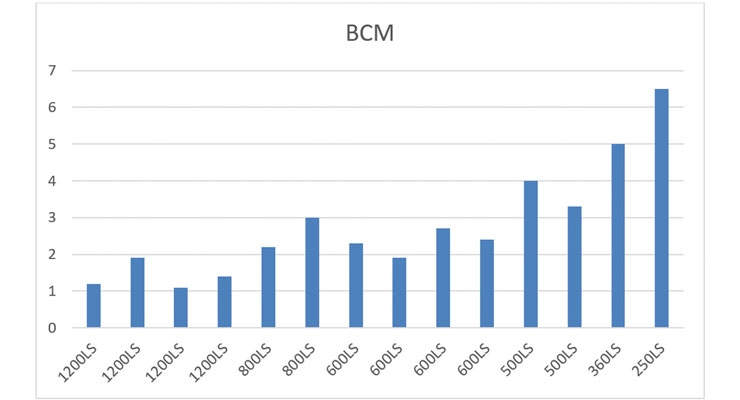
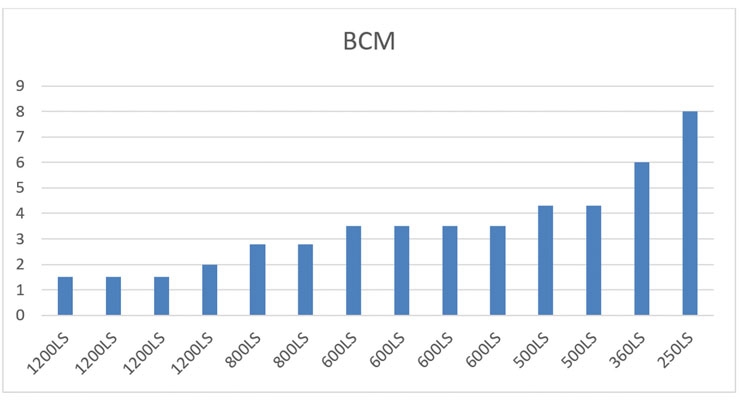
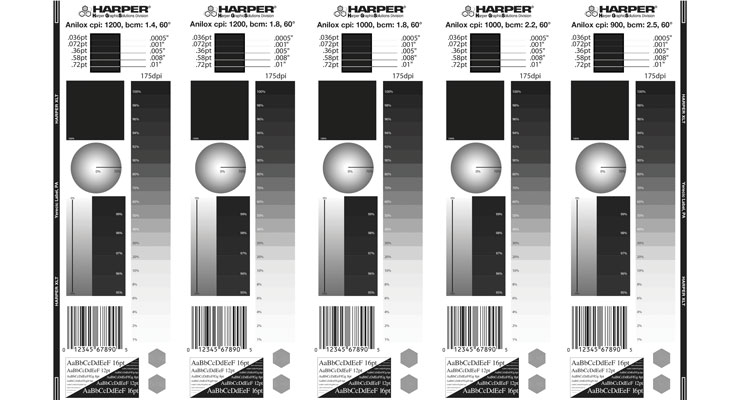
Now that the inventory program and cleaning practices for the anilox roller are in place, the next step is standardization. This is where you have specific line screens and volumes for each press and its graphic needs from process screen to full solid coverage and coatings. Anilox volumes are also progressively stepped incrementally to create a smooth solid ink coverage as volumes increase. Have the anilox rollers audited at least once a year by your supplier. Also, having someone manage the anilox inventory will ensure the consistency needed when going to press with an anilox roller and getting the ink transfer consistency expected. Once audit results come back, review them with your press team and supplier which rollers should go into the standardized inventory you create. Note the illustrations on this page. They show how much volume variation can be in one press’ inventory of rollers. Next, set the volume to a tight standard that applies to each segment of print area coverage that is needed. Once done, you will have a controlled inventory with volume increments that step up nicely, as well as set specific line screens for each volume range.
NARROW WEB INVENTORY
• 1200LS – 1.5BCM – Process Print
• 900LS – 2.5BCM – Combo Screen Vignettes
• 700LS – 3.4BCM – PMS color
• 550LS – 4.3BCM – Spot Heavier Area coverage, cold Foil etc.
• 360LS – 6BCM – O.P. Varnish – Metallics, etc.
FOR EXAMPLE ONLY:
These are line screens and volumes that are in most narrow web inventories, although there may be slight differences from converter to converter. This makes my point for where you need to go with the standardization process. This applies for water-based, solvent and UV inks.
WIDE WEB INVENTORY
• 900LS or 1000LS – 2.3BCM - Process Print
• 800LS – 3.5BCM – Combo Screen - Vignettes
• 500LS – 4.5BCM – PMS color
• 280LS – 6.5BCM – Spot Heavier Coverage Area
• 240LS – 7.5BCM – Metallics, Specialty Coverage
FOR EXAMPLE ONLY:
These are line screens and volumes that are in most wide web inventories, although there may be slight differences from converter to converter. This makes my point for where you need to go with the standardization process for water-based, solvent and UV inks.
Once a full audit is done, you should be able to summarize the results and come into a solution as suggested above for the type of presses you have to accommodate. The audit is a way to utilize as many of the existing aniloxes you already have invested in and to find out how many of those rollers fall into the volume ranges listed above. Investment needs to be made once the audit has been evaluated so you can have the volumes needed in each press inventory. This process needs to be implemented. Putting this protocol into a step-by-step process should motivate management to implement a program that will work for them.
PRESSROOM CORRELATION
Graphic Team Meetings to Initiate the Correlation Process:
Correlation is simply going press to press, and the outcomes need to be consistent from press to press when the print samples are qualified. In doing this process we need to have a standardized inventory and have certified anilox volumes that have already been completed. Put a team together comprised of employees that are connected to the pressroom and know the equipment and the needs of that equipment.
Start with scheduling personnel to ensure the press availability. Material allotment, prepress, press and ink all need to be brought together in the scheduling process. Every component that is needed to achieve correlation needs to be included in the brain-storming session to kick off this process improvement team. Get your suppliers involved in this as well. The major players in the pressroom – your operators – need to be represented, because you will get the best information from them regarding where the weaknesses in their specific presses will be. If there is a variation issue in ink delivery, they should know. Just talk to them and listen and the possibilities will unfold. Have the team put together a step-by-step approach, similar to what I will list below.
HOW DO I START THE CORRELATION AT PRESS?
NOTE: You will be running a printed sample on each press at a specified volume. The volume of the anilox rollers needs to be measured and the volume has to be the same on all presses that are being correlated. The pressroom audit that was done should have allowed you to find the rollers that are at the correct volume or you need to purchase new ones. Remember, you are setting the baseline for color, do what is needed to get this baseline set accurately.
It is imperative that the ink, plates and substrates are all the same batch or lot number. Make sure you formulate enough ink so it will last through the entire testing process. Move these variables from press to press and maintain control of the components and testing process as you go from press to press.
1. Pick a line screen and volume along with your ink technician that is used for spot color work – your main color strength roller. I used a 3.5bcm anilox roller because it was the volume issued by the team that worked on my example correlation. If the pressroom is not standardized, they may not have the same volume anilox rollers on all presses. If a press does not have matched volumes a new anilox roller may be needed for that press in question.
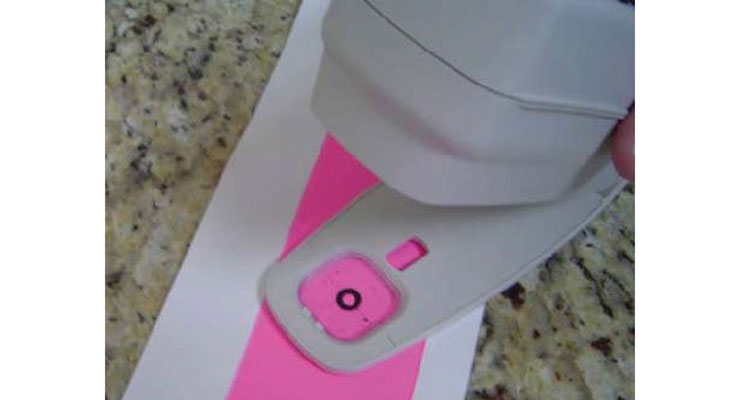
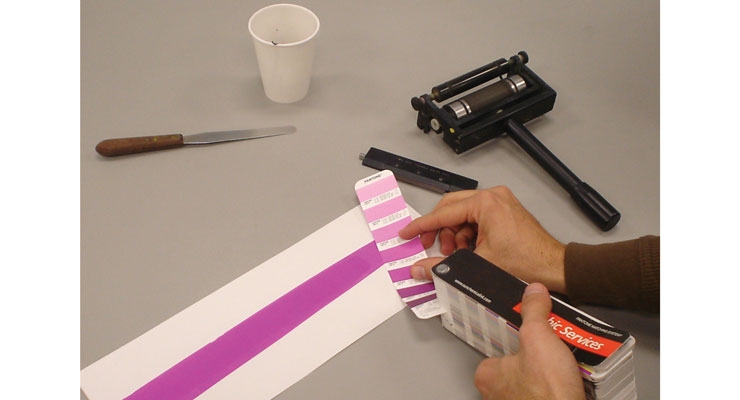
2. Choose a color or two that will be used and formulate enough ink for all the presses to run a press comparison. You would only need to run up printed samples at regular press speeds. Enough samples will be needed so that we can measure spectrophotometer readings and density if the ink is in the process printing range. These samples should be stored and saved for future reference.
3. Allocate one substrate at a width that can fit on all presses. Preferably a common substrate that is used throughout your customer base job orders.
4. Choose a test plate that can be used on all presses with a test target that has sufficient solid ink areas on it, UPC targets, slur targets for impression setting etc. You could even place a few special graphics from different jobs that you run. This way you will have a graphic comparison that you are used to running.
5. Run print samples on all presses with the test plate. Make sure the print is running in an optimal condition mechanically and it can print accepted quality and run the samples. Measuring the ink is not needed at this point – just gathering samples and measuring the data.
6. Measure all samples with a spectrophotometer. Document all the sample readings. Build a report from this data collected. Document! Everything. Document all types of doctoring systems that may be used. If the press in question is mechanically sound then you need to look at making your adjustments with an increase or decrease in volume. Be diligent and don’t assume volume adjustment is the answer, check with the operators, and go back and look over the ink train for a variable. Be sure the hardware is sound before you make the volume adjustment.
7. Make the final decisions on which presses need to have their volumes adjusted. Using the proper proofer volume that has been standardized for the ink lab, you will take the samples back to the lab and compare press-after-press against the ink lab standard. Any presses that did not correlate to the proofer roller should be put aside and will need to be adjusted in order to achieve the target volume. *For example, if the 3.5bcm on Press 7 runs lighter than the ink lab proofer standard roller of 3.5bcm, we will have to make adjustments on Press 7 by increasing volume on the press anilox until we hit the acceptable DE expected with the spectrodensitometer. That will correlate that press 7 to the proofer standard has been set. Just getting started, keep going down the line until all presses are completed. One press down, many to go!
Once you start running qualified samples press to press, make sure that each press is doctoring the same and there are no anomalies occurring while you are running the correlation samples. Document all components used in the print process and date and time all concerns that could matter. Just go from press to press compiling final print results. All print samples will be evaluated at a later date. Any press whose results do not mirror other presses should be put aside. These samples need to be re-evaluated, starting from the metering process on-press to ensure those presses involved are running as they should. Once you verify that those presses are fine, then you need to set a volume adjustment for those presses that will correlate with the ink room draw downs and all other presses involved.
POSSIBLE CAUSE FOR INK FILM VARIATION
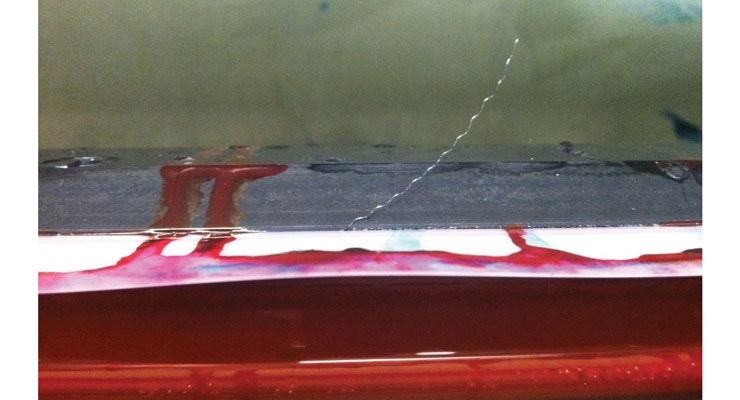
Over impressed blades show contact area being increased, causing a larger foot print of blade material. This is an example of metering variations I see all the time from over impressing doctor blade settings. Once that contact area wears away, the sliver discharges into the chamber or gets caught between the blade and the anilox roller. This promotes score lines. This is a common scenario in wide web more than narrow web, but this also will allow for a higher ink film that increases ink color strength. This will also allow for a thicker ink film being applied to the plate, causing blades to float, which will increase color strength. This is a variation you do not want to have. Also, check all mechanical blade holders to ensure they are not showing any signs of variation to the process.
COMING FULL CIRCLE
EVALUATING THE FINISHED RESULTS?
Most of the work is done now. Take all the samples and evaluate them carefully with your spectrophotometer. All print samples need to match the drawdowns done by the ink technician or your ink company. Any samples that don’t match will most likely be because either less or more volume is needed on that particular press to get those samples to match the target volume of the proofer. If this happens, go back and make sure that the press does not have any issues with its doctoring mechanisms. The final adjustment would be to adjust the ink volume needed at that press to correlate with the ink room. The ink room is the baseline for color. They are using a proofer that will match the volume on press. You just qualified all presses to ensure they are releasing ink at the same efficiency as the proofer device used by the ink technician.
Once you have established a consistent and reliable proofing method and you have managed an optimization of anilox inventory and care, you should be able to get results from correlation testing. Now you can adjust individual press inventories to be consistent from the ink room to press. This will minimize the number of same color ink batches in your ink room inventory.
IN CONCLUSION
Anilox volume is critical for successful color management. Too much deviation from the target volume will cause color shifting. Once volume range is known, consistency across all presses must be maintained. The areas that can create poor color management were pointed out in this article. If further assistance is needed to help pinpoint these areas, feel free to contact your Harper Technical Service representative.
Bill Poulson is the Senior Technical Service Representative for Harper Corporation of America with over 40 years of experience in the Flexographic Industry. He is a FIRST Certified Level III Implementation Specialist by the FTA. Bill has written many articles while with Harper Corporation in areas that help support his customers’ level of anilox knowledge.
Many converters have a variety of press types. These presses may print with enclosed chambers, reverse angle blade systems, rubber roller assist or even at times two roller doctoring. All these doctoring types, along with different press designs and anilox O.D. sizes that affect the RPM (revolutions per minute) of the anilox roller, can allow for a different ink film transfer. I would like to illustrate my approach to press standardization and correlation across all presses. This is a process I have implemented at many converter sites, and it has been a beneficial approach. It takes time and patience to get it done properly. We need a baseline to match it to, as well, and that baseline is the ink technician’s proofer.
When proofing in the lab, you expect to match and get the same color transfer when you go to press. That is if the press is laying down the same ink film thickness or volume used by the ink technician. It makes the technicians job more complicated when the target is moving. The ink lab needs to get the same results time after time when their ink goes to any press. They usually do but the presses are using a variety of volumes. Use a proofer device that will correlate with the flexo process consistently and you will stop the target from moving.
- Measuring these reference points multiple times to show they will stay within 0.2 DE will validate the consistency needed for yourself and the customer.
- Take your wet sample right from the live job when doing correlations.
- Make sure the ink is stirred well and at-press viscosity and temperature is used for drawdowns.
- Doing live samplings off press is the best because it controls all parameters, like temperature and viscosity, and the ink is well stirred.
- Measure through the substrate when doing reverse print correlations.
- Always include backing colors like white, tan, yellows, whatever color is being printed over.
- Include lamination – fully laminate a sample to get every color modifying factor included.
- The process begins with the proofer but does not end here. Press optimization is what this is all about and what matters the most. That is usually the moving target.
- Anilox Management Program
- Anilox Standardization
- Pressroom Correlation
- Full Circle Correlation to Ink Lab
Anilox maintenance is the cornerstone of the flexographic process. Having a system in place where every anilox at every press is documented and accounted for day-to-day for all to see is needed. Have a cleaning program in place where someone not only manages and maintains each anilox roller’s performance will allow a pressroom to run efficiently. If you have 100 to 500 aniloxes, you need this to happen daily. Set up your anilox prep area with the proper offline equipment that will thoroughly clean your inventory on an ongoing basis. Having a trained individual to inspect the anilox rollers and have him or her identify what is needed in an ongoing practice day-to-day will pay itself off immediately. If you do not have the luxury of having the personnel needed, then spread out the responsibility between all the press personnel. Make them own how their rollers are cared for and share this responsibility on all shifts. They should set up internal schedules for managing and cleaning the rollers. Once this is in place, there needs to be a standardized inventory for every press based on the type of work they produce. This can be achieved by implementing an Anilox Management Program, where aniloxes can be evaluated and cleaned. Having that capability will allow you to maintain the rollers. This is the foundation of a standardized pressroom. This will make sure that the anilox rollers are press-ready when they go on press. Let’s discuss the steps needed to ensure you will have a fully standardized anilox inventory.
Anilox Standardization
Now that the inventory program and cleaning practices for the anilox roller are in place, the next step is standardization. This is where you have specific line screens and volumes for each press and its graphic needs from process screen to full solid coverage and coatings. Anilox volumes are also progressively stepped incrementally to create a smooth solid ink coverage as volumes increase. Have the anilox rollers audited at least once a year by your supplier. Also, having someone manage the anilox inventory will ensure the consistency needed when going to press with an anilox roller and getting the ink transfer consistency expected. Once audit results come back, review them with your press team and supplier which rollers should go into the standardized inventory you create. Note the illustrations on this page. They show how much volume variation can be in one press’ inventory of rollers. Next, set the volume to a tight standard that applies to each segment of print area coverage that is needed. Once done, you will have a controlled inventory with volume increments that step up nicely, as well as set specific line screens for each volume range.
NARROW WEB INVENTORY
• 1200LS – 1.5BCM – Process Print
• 900LS – 2.5BCM – Combo Screen Vignettes
• 700LS – 3.4BCM – PMS color
• 550LS – 4.3BCM – Spot Heavier Area coverage, cold Foil etc.
• 360LS – 6BCM – O.P. Varnish – Metallics, etc.
FOR EXAMPLE ONLY:
These are line screens and volumes that are in most narrow web inventories, although there may be slight differences from converter to converter. This makes my point for where you need to go with the standardization process. This applies for water-based, solvent and UV inks.
WIDE WEB INVENTORY
• 900LS or 1000LS – 2.3BCM - Process Print
• 800LS – 3.5BCM – Combo Screen - Vignettes
• 500LS – 4.5BCM – PMS color
• 280LS – 6.5BCM – Spot Heavier Coverage Area
• 240LS – 7.5BCM – Metallics, Specialty Coverage
FOR EXAMPLE ONLY:
These are line screens and volumes that are in most wide web inventories, although there may be slight differences from converter to converter. This makes my point for where you need to go with the standardization process for water-based, solvent and UV inks.
Once a full audit is done, you should be able to summarize the results and come into a solution as suggested above for the type of presses you have to accommodate. The audit is a way to utilize as many of the existing aniloxes you already have invested in and to find out how many of those rollers fall into the volume ranges listed above. Investment needs to be made once the audit has been evaluated so you can have the volumes needed in each press inventory. This process needs to be implemented. Putting this protocol into a step-by-step process should motivate management to implement a program that will work for them.
PRESSROOM CORRELATION
Graphic Team Meetings to Initiate the Correlation Process:
Correlation is simply going press to press, and the outcomes need to be consistent from press to press when the print samples are qualified. In doing this process we need to have a standardized inventory and have certified anilox volumes that have already been completed. Put a team together comprised of employees that are connected to the pressroom and know the equipment and the needs of that equipment.
Start with scheduling personnel to ensure the press availability. Material allotment, prepress, press and ink all need to be brought together in the scheduling process. Every component that is needed to achieve correlation needs to be included in the brain-storming session to kick off this process improvement team. Get your suppliers involved in this as well. The major players in the pressroom – your operators – need to be represented, because you will get the best information from them regarding where the weaknesses in their specific presses will be. If there is a variation issue in ink delivery, they should know. Just talk to them and listen and the possibilities will unfold. Have the team put together a step-by-step approach, similar to what I will list below.
HOW DO I START THE CORRELATION AT PRESS?
NOTE: You will be running a printed sample on each press at a specified volume. The volume of the anilox rollers needs to be measured and the volume has to be the same on all presses that are being correlated. The pressroom audit that was done should have allowed you to find the rollers that are at the correct volume or you need to purchase new ones. Remember, you are setting the baseline for color, do what is needed to get this baseline set accurately.
It is imperative that the ink, plates and substrates are all the same batch or lot number. Make sure you formulate enough ink so it will last through the entire testing process. Move these variables from press to press and maintain control of the components and testing process as you go from press to press.
1. Pick a line screen and volume along with your ink technician that is used for spot color work – your main color strength roller. I used a 3.5bcm anilox roller because it was the volume issued by the team that worked on my example correlation. If the pressroom is not standardized, they may not have the same volume anilox rollers on all presses. If a press does not have matched volumes a new anilox roller may be needed for that press in question.
2. Choose a color or two that will be used and formulate enough ink for all the presses to run a press comparison. You would only need to run up printed samples at regular press speeds. Enough samples will be needed so that we can measure spectrophotometer readings and density if the ink is in the process printing range. These samples should be stored and saved for future reference.
3. Allocate one substrate at a width that can fit on all presses. Preferably a common substrate that is used throughout your customer base job orders.
4. Choose a test plate that can be used on all presses with a test target that has sufficient solid ink areas on it, UPC targets, slur targets for impression setting etc. You could even place a few special graphics from different jobs that you run. This way you will have a graphic comparison that you are used to running.
5. Run print samples on all presses with the test plate. Make sure the print is running in an optimal condition mechanically and it can print accepted quality and run the samples. Measuring the ink is not needed at this point – just gathering samples and measuring the data.
6. Measure all samples with a spectrophotometer. Document all the sample readings. Build a report from this data collected. Document! Everything. Document all types of doctoring systems that may be used. If the press in question is mechanically sound then you need to look at making your adjustments with an increase or decrease in volume. Be diligent and don’t assume volume adjustment is the answer, check with the operators, and go back and look over the ink train for a variable. Be sure the hardware is sound before you make the volume adjustment.
7. Make the final decisions on which presses need to have their volumes adjusted. Using the proper proofer volume that has been standardized for the ink lab, you will take the samples back to the lab and compare press-after-press against the ink lab standard. Any presses that did not correlate to the proofer roller should be put aside and will need to be adjusted in order to achieve the target volume. *For example, if the 3.5bcm on Press 7 runs lighter than the ink lab proofer standard roller of 3.5bcm, we will have to make adjustments on Press 7 by increasing volume on the press anilox until we hit the acceptable DE expected with the spectrodensitometer. That will correlate that press 7 to the proofer standard has been set. Just getting started, keep going down the line until all presses are completed. One press down, many to go!
Once you start running qualified samples press to press, make sure that each press is doctoring the same and there are no anomalies occurring while you are running the correlation samples. Document all components used in the print process and date and time all concerns that could matter. Just go from press to press compiling final print results. All print samples will be evaluated at a later date. Any press whose results do not mirror other presses should be put aside. These samples need to be re-evaluated, starting from the metering process on-press to ensure those presses involved are running as they should. Once you verify that those presses are fine, then you need to set a volume adjustment for those presses that will correlate with the ink room draw downs and all other presses involved.
POSSIBLE CAUSE FOR INK FILM VARIATION
Over impressed blades show contact area being increased, causing a larger foot print of blade material. This is an example of metering variations I see all the time from over impressing doctor blade settings. Once that contact area wears away, the sliver discharges into the chamber or gets caught between the blade and the anilox roller. This promotes score lines. This is a common scenario in wide web more than narrow web, but this also will allow for a higher ink film that increases ink color strength. This will also allow for a thicker ink film being applied to the plate, causing blades to float, which will increase color strength. This is a variation you do not want to have. Also, check all mechanical blade holders to ensure they are not showing any signs of variation to the process.
COMING FULL CIRCLE
EVALUATING THE FINISHED RESULTS?
Most of the work is done now. Take all the samples and evaluate them carefully with your spectrophotometer. All print samples need to match the drawdowns done by the ink technician or your ink company. Any samples that don’t match will most likely be because either less or more volume is needed on that particular press to get those samples to match the target volume of the proofer. If this happens, go back and make sure that the press does not have any issues with its doctoring mechanisms. The final adjustment would be to adjust the ink volume needed at that press to correlate with the ink room. The ink room is the baseline for color. They are using a proofer that will match the volume on press. You just qualified all presses to ensure they are releasing ink at the same efficiency as the proofer device used by the ink technician.
Once you have established a consistent and reliable proofing method and you have managed an optimization of anilox inventory and care, you should be able to get results from correlation testing. Now you can adjust individual press inventories to be consistent from the ink room to press. This will minimize the number of same color ink batches in your ink room inventory.
IN CONCLUSION
Anilox volume is critical for successful color management. Too much deviation from the target volume will cause color shifting. Once volume range is known, consistency across all presses must be maintained. The areas that can create poor color management were pointed out in this article. If further assistance is needed to help pinpoint these areas, feel free to contact your Harper Technical Service representative.
Bill Poulson is the Senior Technical Service Representative for Harper Corporation of America with over 40 years of experience in the Flexographic Industry. He is a FIRST Certified Level III Implementation Specialist by the FTA. Bill has written many articles while with Harper Corporation in areas that help support his customers’ level of anilox knowledge.